| Home Page
Favorite Links Page
About The Palace
New Users-Read First
Pictures From The Palace
How To Make Avs
How To Edit Avs
Contact Page
Make Photos In To Avatars
Make Your Own Palace-PG.1
Make Your Own Palace-PG.2
Guest Book Page
Photo3 Page
Photo4 Page
Photo5 Page
Photo6 Page
Shopping Page Page
Slide Show Page
Message Boards and Chat room
|
|
|
An avatar is a representation of you -- how others see you -- when you're in the CyberMatch Palace or any other palace. If you register with The Palace, Inc., you can create your own avatar from a photo, or from a graphics file.
1. Scanning a photo
If you do not own a scanner, go to your local copy center and have your photo scanned. Make sure the resolution of the scanned image is between 100 and 300 dpi. Save the image in .GIF format.
2. Applying the correct color palette
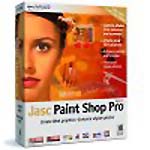
You can create graphics using any palette, but the pictures may not look the same on the Palace. To get the correct look, you'll need to obtain the palette used by the palace and apply it to your image. This requires a graphics program such as Adobe Photoshop* or Paint Shop Pro*.
Using your graphics program, open the file PGATE.GIF, which resides in the PALACE\PICTURES directory. Within the graphics program, extract the color information as a "palette file" (the procedure for this will differ from program to program). For example, in Photoshop, choose Mode, then Color Table, and then choose Save. In Paint Shop Pro, choose Colors and then Save Palette.
Now open your avatar image. If it isn't a .GIF file, convert it to one. Then apply the palette you just saved. In Photoshop, choose Mode, then Color Table, and then choose Load. In Paint Shop Pro, choose Colors and then Load Palette. Select the file you just saved.
|
|
|
3. Resizing the image. Standard avatars and props are 44 x 44 pixels in size. But you can also make oversized avatars by combining up to nine standard-sized ones (for a total of 132 x 132 pixels). Use your graphics program to size your image to the appropriate size. Depending on the image, you may need to experiment a couple of times to see which size looks best.
4. Pasting the image into your prop suitcase
After sizing the image, copy it to the Clipboard (press Control-C).
Start the Palace software and open your prop suitcase (click on the suitcase). You don't need to connect to a Palace.
Click the New button.
If your avatar is the standard 44 x 44 size, move the cursor into the graphics window (where the big round face is) and press Ctrl-V. This pastes your avatar from the Clipboard. Give your avatar a name, choose the "head" property (by clicking on the word "head"), and then click the OK button.
If your avatar is larger than 44 x 44 pixels, select "Paste Multiple Props" from the Edit menu on the Menu Bar. This automatically breaks up the image into multiple 44 x 44 pixel props and pastes them from the Clipboard into your prop suitcase. Give your avatar a name and then click the OK button. Note: this procedure will also work for avatars which are 44 x 44 pixels.
|
|
5. Wearing your new avatar
Connect to a Palace.
Open up your prop suitcase and click the Naked button.
Double-click on all the pieces of your avatar. There you are!
To make it easy to wear your avatar in the future, save your appearance in a macro. From the menu, choose Macros, then Record Macro, then 1. To wear your avatar in the future, just press Ctrl-1.
|
|
|
|