| Home Page
Favorite Links Page
About The Palace
New Users-Read First
Pictures From The Palace
How To Make Avs
How To Edit Avs
Contact Page
Make Photos In To Avatars
Make Your Own Palace-PG.1
Make Your Own Palace-PG.2
Guest Book Page
Photo3 Page
Photo4 Page
Photo5 Page
Photo6 Page
Shopping Page Page
Slide Show Page
Message Boards and Chat room
|
|
The Avatar Wizard- The avatar wizard is one of the few specialized posts on palace. Most wizards in charge of avatars find time for little else (in terms of palace duties). There is a lot of work involved in maintaining a decent sized avatar collection
Avatar wizards need to:
find suitable (or highly inappropriate - whatever the case may be) pictures to make into avatars
convert these pictures into the palace pallette (not as easy as you might think)
edit the picture in palace ( a time consuming and obsessive activity)
regular prop room maintenence (cycling through props, prop purging and uploading of avatars)
Yet some people think it's fun... which just goes to show....
Adobe Photoshop is probably the most widely used graphics program on Palace as there is an official pallette for it. Therefore, it gives the best colour conversion. JASC Paintshop Pro is also widely used. Any other graphic program can be used with palace but the colour conversions may not be as good.
For a brilliant tutorial on how to make good avatars, visit Dr. X's House o Props n Bots
If you make your own avatars, be prepared to have some them 'stolen' by some other less scrupulous palaces. To minimize this, you may choose to restrict access to your avatars by imposing a password to the Avatar Gate. Or you can grab a squeezeball and console yourself with the thought that your edits were good enough to steal...
Thief Thwarting Tip
It is good practice to name every single piece in each of the avatars that you make. Not only does it protect against losing the pieces the next time the props are purged, it can act as an identifier as to who made the prop or which palace it came from. Of course the pieces can be renamed but it takes the most anal retentive theif to sit down and rename all the pieces to all the stolen props.
Creative Wizards
Creative wizards are responsible for the graphics, ideas and text in the palace. If you are lucky, you may find a few artistic souls to help out in your palace. Palaces featuring original art are few and highly prized.
Examples of palaces featuring original art:
Digital Exposure
Xmission
House of Media
Creativity is not limited to artwork alone. It can extend to room concepts and script ideas.
Creative wizards can be specially nominated or it can be a responsibility shared among all your wizards. Creative wizards and scripting wizards work closely together. Sometimes, creation and scripting are done by one person.
|
|
Scripting Wizards (usually owners or wizards with owner privelages)
Scripting is a big responsibility. A wrong word, a forgotten bracket can lead to problems with the server - a crash being the worst case scenario.
The palace is buggy enough to cause lost doors and corrupted scripts to appear when all you tried to do was resize a door.
Reading the Official Iptscrae manual is as effective as reading a dictionary to learn how to speak English. At least for non-programmers like me. However, I found a great site called Ori's Palace Instructions. It takes you through some basic scripts and explains them step by step. The scripts he has listed are enough to help you set up a basic palace.
Once you have read through this website, the next step is to try Tandika Starr's Iptscrae Lessons. The lessons mainly talk about cyborgs but it is applicable to roomscripts as well. The lessons are well structured and interesting to read. Things start making more sense once you go through each lesson. Then you might want to try the official Iptscrae manual again...
Copying scripts and dumping them in verbatim is not recommended. You may not need to understand the entire script but you should have some idea as to which part needs to be modified for use in your palace. Remember to pay attention to the Spot or Door IDs. Some scripts don't work if you use the wrong ID number.
|
Adding Music and Sound
Music and ambient sound can enhance the atmosphere in a room. But make sure you include the option to SWITCH IT OFF! Not everyone appreciates MIDI and people with slow modems may curse if you forced them to download large wav files.
What Format?
Midi
Midis are computer generated using synthesizers. They can sound very close to the original (especially if the original is a Pet Shop Boys creation...) but a lot of them can seem very similar to the sound of one hand playing...
PROS
Midis are plentiful on the Internet and are the smallest size format available. Good quality midis can sound very close to the original especially if you have MIDI rendering software like WINGROOVE. Midis require only one download.
CONS
Midis can sound really annoying without good rendering software or a good soundcard. Jukebox scripts with the INCHAT function (i.e.: triggered by one and heard by all) is a source of much cursing and swearing amongst those who aren't fans of MIDI.
Indications
Best used as background music. Utilize a 'button' that users can click to activate the Midi. Automatic entry midis are a no-no unless they form part of a special presentation. Some people have the CD playing while they surf and chat - and the resulting cacophony is not appreciated.
Where to find them
Midis R Us
Midi Composers
WAV
Wav files are samples of recorded sound. You can make them yourself with a microphone and the Sound Recorder option in Windows (haven't a clue what the equivalent is on Mac - sorry!) You can also record entire songs in wav format.
PROS
Wavs allow you to play soundfiles in palace. Some palaces convert songs to low quality wavs for their jukebox. Wav files need only one download.
CONS
There is a limit of 2 MB for each wav - bigger files are not recognised by older versions of palace. (However, Logan's Fury tells me that he has wav files approximately 15 MBs in his palace that work!) But bear in mind that most people will be complaining by 0.5 MBs. Wavs are notoriously large files by palace standards especially if you are going to use it for a whole song. Small sized wavs come at the cost of stereo sound and sound quality.
Indications
Ideally used for ambient or triggered sound effects (e.g.: explosions, running water, waves etc), short voice messages and short song clips.
Where to Get them
The Magic SOund Bla
Wav Central
Make your own!!!!
Real Audio
Real Audio is a web-streaming audio format that allows you to listen to CD quality sound without having to wait to download an entire file first. You can integrate Real Audio with palace via the NETGOTO command.
An example of a simple script is as follows:
ON SELECT {
"http://yourdirectory/realaudio/yoursong.ram" NETGOTO}
PROS
Can be placed on a seperate webserver saving precious palace server space. Can be as high or low quality as you want. The average real audio file size is 1 - 2 MBs. There is no need for a long download because it uses streaming audio.
CONS
Read Audio needs the software plugin which some people do not have installed. Some free webspaces may not support streaming audio. Real Audio is not accessed directly from palace, you have to go through a browser. This may be a strain on slower machines. Because it uses streaming audio, it needs a short download everytime. Lastly, Real Audio files are a bugger to make! (Even with Real Producer)
Indications
If you wish to provide good quality music and do not have the server space to spare.
How to make a Real Audio file
Use Real Producer - it is a free download from the Real Audio website. You may need to record your songs first in wav format before converting them to Real Audio.
MP3s can also be used instead of wavs. However, to use them you need to have installed a codec in your computer. Visit Studio Dust Palace Tips for more information and to download the codec. (Thanks to Floyd Miller for this tip!)
What Script?
The scripts that I have chosen to put here are just to start you off. They are extremely basic and for quick reference only. If you have no previous knowledge of iptscrae and no idea how to put together a basic script, please read Ori's Palace Instructions first for some easy to understand basic explainations.
The most basic sound script is triggered off by someone clicking on a door or spot.
ON SELECT {
"" SOUND
}
This works for all midi and wav files. The MIDIPLAY command can be used for midi files as well but the SOUND command does the same thing. Once a wav file is triggered, there isn't a way to shut it off. However, the midi file is easily interruptable with the following command typed into the text box: / MIDISTOP.
You can easily program in a shortcut for your users by using an OUTCHAT command. This means that if the user types in the special command, usually 'ms', the Midi file automatically stops playing. The user does not need to know the exact filename of the midi playing. It will not affect any one else in the room who may be listening to the midi as well. This can be done by adding an section to your script (highlighted in italics), for e.g.:
ON SELECT {
""SOUND
}
ON OUTCHAT {
{"" MIDISTOP } CHATSTR "ms" == IF
}
If you wish to provide a jukebox in your palace, check out the jukebox scripts at the Script Barn. You can choose to implement it with elaborate graphics or use a simple list triggered by OUTCHAT commands.
Sounds that play upon entry tend to be ambient sounds or a greeting message. If this is part of a room tour, ensure that you provide a seperate room for people to predownload the sound before entering that room otherwise, they will not hear the sound the first time.
Predownloading sounds can be done in two ways.
The Upfront way - via the simple ON SELECT function:
Label: To predownload sounds click here...
Script: ON SELECT {
"" SOUND
"" SOUND
"" SOUND
;and so on
}
The Sneaky way - via an ON ENTER script:
Use a short wav as the first wav. Using one of the sound effects supplied with palace is a good idea. Then sneak in the wavs you wish the user to download after it. Place this script in a 'entrance room' for your presentation.
Script: ON ENTER {
"debut"SOUND
"" SOUND
"" SOUND
;and so on
}
Getting Loopy
Some rooms - like waterfalls, fountains and fireplaces are favourite targets of animation. To further enhance the atmosphere, a looped wav can be inserted.
ON ENTER {
0 ME SETALARM
}
ON ALARM {
"" SOUND
400 ME SETALARM
}
What happens in this script is, that when you enter the room, an alarm gets triggered which activates the script in that spot. 400 is the number of ticks before the script is repeated again. (Modify it according to the duration you want) A tick is roughly 1/60th of a second but in realtime, it is modified by the speed of your client and server and network load.
A brief note on animations
To adequetely cover the topic of animation, I would probably have to write a whole new document with chapters of its own. Since I am no animation expert, nor talented enough to draw people without stick limbs, a round head and a smiley face, I feel I would be out of my depth to embark on such a task. So here's an extremely short introduction to them:
Animations on palace can be triggered or ambient. Examples of triggered animations include - ghostly figures that appear when clicking on a spot, pictures that appear by command etc. Popular ambient animations include running water, a flickering flame, stars etc.
Each animation slice must be saved as a seperate gif file. Make sure they are the same size otherwise you will get pictures out of synch with each other. When you add them to a spot, each slice gets a spotstate number. The first slice is always 0. Animations in palace work by cycling through these spotstates - either as a loop (ambient animations) or simple spotstate changes (triggered animation).
Simple triggered animation script: ( SETSPOTSTATELOCAL)
ON SELECT {
1 5 SETSPOTSTATELOCAL
{0 5 SETSPOTSTATELOCAL} 300 ALARMEXEC
}
This script changes the spotstate in spot 5, to 1 therefore showing the second animation slice. It reverts back to 0 (the first slice) after 300 ticks. SETSPOTSTATELOCAL means that the statechange can only be seen by the person triggering it. To make the whole room see the statechange, replace it with SETSPOTSTATE.
Simple looped animation script:
ON ENTER
{
50 ME SETALARM
}
ON ALARM
{ { 0 ME SETSPOTSTATELOCAL }
{ ME GETSPOTSTATE 1 + ME SETSPOTSTATELOCAL }
ME GETSPOTSTATE 1 > IFELSE
50 ME SETALARM
}
This looped scripts works only with 3 sliced loops. You need to modify the number in the 3rd line after ON ALARM to the number of slices you have in your loop -2 slices. The 4th line sets how quickly each frame is to be shown.
WARNING... don't make that number too small otherwise you may get killed from your own palace for 'flooding' everytime that script is activated.
For a great example of a combination of looped sound and ambient animation, check out Edge of Heaven's fountain.
Ok, now that you have absolutely no idea what I'm talking about, have a look in Ori's Palace Instructions for more detailed explainations of everything I have mentioned here.
|
|
|
|
Anyone can start a Palace. That is both the beauty and the pain of the Palace community.
You can easily obtain a palace server (or get one now at http://www.thepalace.com/products/perserver/), which can be launched on whatever IP (Internet Provider) you are using. The Palace server (called Pserver on the Mac) is a separate application from the Palace client and both need to be running for you to connect to your own Palace and begin the work of creating your own world.
When you launch your Palace server application, it will automatically send a signal to the Palace Directory Web Page, which will then show your palace on that Directory. Obviously, until your Palace is ready for public use, you don't want it to appear on the Directory. You can block that by going into the Preferences in the menu and turning that option off. Then no message will be sent to the Directory and you can launch and work on your Palace in complete privacy.
When launched, your Palace comes with the a few rooms already installed, such as the gate, the Bar, the Backgammon table, etc. But you can modify your palace to make it uniquely your own by adding your own rooms and changing the GIFs.
You can find lots of pictures on the web and on CD's, or you can create your own rooms with programs like Ray Dream Studio and Bryce. Regardless, you'll have to make some modifications on them to fit them into your Palace.
First, you should have some graphics program that is capable of manipulating pictures. The Mercedes of graphics programs remains Adobe's Photoshop, but for many of us it remains too expensive to buy. Some shareware programs, however, work very well and will do almost everything you need to create cool looking rooms. For Mac users, I recommend Graphic Converter and GIF Converter, both available as shareware. For PC users, I recommend Paint Shop Pro, again available on the web as shareware. Once you've d/l'ed (downloaded) one of these applications, open it and then open the picture you want to put into your Palace.
Palace requires that your pics be 1) GIFs (Macs can download jpg's, but you'll still need GIFs in place for your PC users), 2) 72 X 72 resolution, 3) 236 colors, and 4) 512 X 384 sized. Let's take each of those in turn.
GIFs: Most graphics programs can save your pic into another format. So, you can open a JPEG, for example, and save it as a GIF. When you do, the appendix .GIF should be attached to the name of the file. You should be able to convert PICT, TIFF, and other graphics files, too.
Resolution: The graphics program should have a feature that allows you to change the resolution of the image. Some high quality photo CD images can have resolutions of 300 X 300, but Palace will only read 72 X 72 resolution. Again, you can convert your image to the proper resolution and save it.
Colors: Palace also only reads 236 colors (not a typo--I know, it's weird), not the thousands or millions that many graphics programs read. So, you'll have to convert your image to 236 colors. Here's where things can get a little dicey. An image in thousands or millions of colors may look pretty bad when converted to only 236 colors (don't I know it!). The image can look distorted, with strange blobs rather than the nice colors it had in the original image. You can manipulate your original image several times to achieve the best look possible. Try turning dithering off, for example, before you convert to 236 colors. If that looks bad (it probably will), try leaving it on and then converting. Now, most graphics programs convert to 256 colors, as I'm sure you know and probably have been muttering to yourself this entire paragraph. Read on.
Palette: To make the best pics possible, you'll want to use the Palace color palette before you convert your image to 256 or 236 colors. You can use the Palace color palette with Photoshop, Paint Shop Pro (for PC users) and Graphic Converter (for Mac users). To learn how to get the Palace palette, please see the web page called Avs of Steel, which is a part of Dr. X's fine collection of Palace information. The directions are clear and useful and you can obtain the Palace palette for several graphics programs under the Clut section on that web page. Using the Palace palette will greatly enhance your final image quality.
Size: Finally, you'll need to size your image to 512 horizontal by 384 vertical pixels. Your graphics program should be able to do that, too. Note, however, that while you can resize an image down to size, changing a smaller image into a larger one will almost certainly cause it to look fuzzy and out of focus. So, when your hunting for cool pictures to put in your Palace, you'll probably want to reject anything that's not at least close to 512 X 384 originally.
Once your picture is Palace ready, save it and move the image to your Palace:Pictures folder. That's where it needs to be so that you can actually call it up into your Palace.
Now, in your Palace go to Wizard mode (you set the wizard code from your server's Preferences menu). Then under the Wizard menu (only visible when you are in wizard mode) go to Create New Room. Presto! You'll be transported to a new room with a name like "Room 124." The default room GIF is "Clouds" so you'll see a background of blue sky and fluffy clouds, but you can soon change that. Under the Wizard Menu, pull down the Room Info menu. That opens a dialogue box where you can start making changes:SEE PICTURE ABOVE.
In the illustration you'll see a line called Pict which will read "Clouds.GIF" without the quotation marks. Just change the name there to the name of the image you want to call up--we'll call that "Filename.GIF" Type the name of the GIF in that spot, making sure you put the appendix .GIF and you should immediately see your new picture as the background to the room.
So, creating a new room picture is not all that hard. The tricky part is making it look good while fitting the Palace requirements of resolution, colors, and size. Other users will be able to d/l your new background picture automatically as part of the Palace client program.
Once you've created your background picture, you can also overlay GIFs. This can create very cool effects, such an animations, text or images that work with scripts for special effects. In the following section, I'll describe how to make such GIFs, how to install them on your Palace, and give you some idea of why you'd want to use such overlays by talking about some actual uses for them in CyberQuest Palace (207.140.30.49) where I am a wiz.
Creating a GIF to overlay in a room is a lot like creating a GIF for a web page. If you've done web page GIFs, this should be a snap. If not, you'll now learn.
Call Up and Resize: First, using your graphics program, call up the image you want to overlay. This probably will be something like text or small pictures of trees, ferns, people, boats, or whatever. If you get such images from a CD the image will probably call up with a white background surrounding the GIF--a picture of a guitar with a white background, for example. Convert and save your GIF in the same fashion described above, except you'll want to resize your GIF to the size you want it when you call it up on Palace. Resize it so the image, not the background, is the size you want. (By the way, I've mentioned text as something that can be overlaid as a gif. Can anything be more ugly than the text Palace uses when you make a door name visible? You've probably seen such text--in fact, we still have some at CyberQuest, but making any necessary text into lovely, colored, and anti-aliased text sure beats the horror of Palacetext.
Transparency: Now, you can make the background transparent using your graphics program. Most graphics applications will allow you to create a "GIF transparency." You can make the white background transparent, then. The white background won't show up at all and you'll only see the other colors of the image. Once you hit "GIF Transparency" it's possible you'll still see the white background in the graphics application, but it should still be transparent when called up in Palace.
PC USERS NOTE: One helpful reader (Ken) sent the following information regarding creating transparencies in PaintShop Pro: "I tried the PSP in Palace and got a transparent background with no trouble. One must save the file with the background color on the program set to the color one wants transparent. Then under options when saving click the box that sets transparent color as background."
Mac USERS NOTE: To create a transparency in GraphicConverter, go to the Pictures menu and then to Toolbox. That will bring up a small palette which has the transparency tool, which lies just to the right of the text tool. To create a transparency in Photoshop, export your file as a GIF and you'll be asked which color you'd like transparent.
Create and Position Door: Save your new image into your Palace:Pictures folder. Then in the room you want the image, create a new door. Size the door to about an inch square. You can change the size and location of the door by highlighting the door "handles." Clicking in the center of the door makes those handles visible as small tabs which appear at the four corners of the door. You may then move each of the four handles wherever you want. That will both size and position the door. Open the door dialogue box by going in the Wizard Menu under Door Info. That dialogue box has a place called PICT's. Clicking on that spot opens another dialogue box.
|
Then, we added the script below:
ON SELECT
{1 7 SETSPOTSTATELOCAL
325 257 SETPOS
"@39 232The Foyer is the beginning point for the various Wings at Cyberquest.Take a tour of Spinny's Universe! Stroll through the magnificent gardens of an old English Home. Or just relax in some of the more modern rooms we offer." LOCALMSG
"@39 232Your next stop is Imagination, so hold on tight. Hey, not that tight!" LOCALMSG
{ 166 GOTOROOM } 2200 ALARMEXEC
{ 0 7 SETSPOTSTATELOCAL } 2200 ALARMEXEC}
That particular script performs several functions, but let's just focus on the door state for now. You'll notice in line two that the 1 7 SETSPOTSTATELOCAL changes the state of door #7 to state 1. (The door state is the very first numeral you see there. The second number refers to the door ID#.) Remember that door state 0 shows no GIF at all . Linda only appears when the door state becomes 1. So, the script first changes the door state to 1 and makes Linda appear. I love it! Then, in the last line you'll notice 0 7 SETSPOTSTATELOCAL. That changes the door state back to 0 and Linda disappears.
To simplify, you can change the door state to make an overlaid GIF pop up. In it's most simple state, here is that script:
ON SELECT
{
{ 0 ME SETSPOTSTATELOCAL }
{ ME GETSPOTSTATE 1 + ME SETSPOTSTATELOCAL }
ME GETSPOTSTATE 0 > IFELSE
}
In this script, when the door is touched once, the script makes the door state change from 0 to 1. When the door is touched again, the door state changes from 1 to 0. It's a simple, but very useful script and comes in handy when you use the lockable door script described on another page.
Example, the last (somewhat tricky!): Go to the Romance Island room at CyberQuest. Once you've found Romance Island, make the room into the night version (say "night") and click on the moon. You'll start seeing stars twinkling in the darkened night sky--an extremely cool effect. Those stars are a series of animated overlaid GIFs. And if that room doesn't make you want to learn how to overlay and animate GIFs, nothing will!
Here's how you can achieve that same kind of effect:
Go back to the PICT dialogue box in the Door Info dialogue box. Remember that the door initially came with in the first line. That initial state is called 0. That means no picture will appear if is the first line in that box. But you can delete the and start adding your own GIFS. Look at the example below:
|
|
|
|
And so, in that door's pict box, we have inserted no less than 13 separate GIFs. And we can insert a script to make those GIFs animate in sequential order (and repeat, so the animation effect continues). Below is that exact script:
ON SELECT
{
10 ME SETALARM
}
ON ALARM
{ { 0 ME SETSPOTSTATELOCAL }
{ ME GETSPOTSTATE 1 + ME
SETSPOTSTATELOCAL }
ME GETSPOTSTATE 13 > IFELSE
5 ME SETALARM
}
When touched (selected), the script will cause the GIF to cycle through all the door states, causing it to animate and the stars twinkle!. Whoa! You can change the rate of speed for the animation by varying the number before ME SETALARM in the last line. Play with that number to achieve the speed of animation you desire.
Remember that the above scripts cause some lag and lag sucks, so use animation with caution, especially on small home-based servers. Also, remember that the smaller the GIF, the less the lag.
With the above information on room GIFs and overlaid GIFs you'll be able to achieve a wide variety of effects. Go to lots of palaces to see what others have done and then be creative yourself. It's a lot of fun, can look cool, and with any luck you won't crash the server.
|
In order to change the nature of the room (give it a different name, make it private, etc.) you need to know how to make changes in the Room Info Dialogue Box. You can call it up by going to Wizard mode and under the Wizard Menu dragging to Room Info . . .
Doing that calls up a dialogue box which has six subparts you can modify and change. I've included examples below, first for the Mac, and below that for the PC.
Keep the parts of the dialogue box in mind as I'll be refering back to them in everything that follows. Now, let's begin to make changes.
ID: The first position, ID, is followed by a number determined by the server. You will not need to change this in any way. The server automatically numbers new rooms as you add them in. You will, however, need to know a given room's ID# so that you can link to that room through doors in other rooms.
Name: The second position, Name, you'll certainly want to change if you're adding in your own room pictures. You can tab through the spots to highlight them. Once highlighted, you can make modifications. Try changing the name of the room. Highlight the Name spot, and type a new name, then click OK. It's as easy as that. Your room's name, by the way, can be quite long and you are not limited in name length by the size of the visible space in that dialogue area.
Remember that while the room's name can be long, not all of a long name will be visible in the Go To Room dialogue box that users can call up.
GIF: The third position down, Pict, is where you insert the name of the new GIF you want to call up. If you've gone through section I of these directions, you're already familiar with that.
Artist: The forth spot down, Artist, will be filled in only if you're making changes to an existing room that comes standard with the server. You can leave this spot blank for new rooms that you add, or fill it in if you know the artist's or photographer's name.
Remember that artwork on the web is still subject to copywrite laws. Artwork is property, after all. It's considered very uncool for you to take another Palace's rooms and put them in your own Palace. If you want to use another person's room or art for some other reason (like making an overlaid gif for a Palace link), contact the artist or a wizard of that Palace and get permission to use that picture or artwork. I really encourage you to create your own Palace rooms, and with relatively inexpensive programs like Bryce and Ray Dream Studio, even non-professionals can create very cool-looking rooms.
Other Options: The fifth position down, called Options on the Mac, contains a submenu you can access which itself has five parts: Private, No User Scripts, No Painting Allowed, Hidden From Room List, No Guests Allowed. On the PC these are listed as boxes you can check. They are self-explanatory except for "Private." Activating that means you can make that room lockable and it will appear on the Go To Room list with a dash (-) instead of a numeral like 0 for number of users in the room. The No User Scripts option is handy if you don't want users erasing props with the "clean" command, for example, or creating serious lag by zapping each other with one of the many dreaded zap scripts. The Hidden From Room List is handy when you want to store your avs in a room users can't see on the Go To Room list. (Wizards can see all the rooms on the room list, hidden or not). And finally, the No Guests Allowed means that only registered members of Palace can enter that particular room. I'll be referring back to these Options in later directions, so make sure you're familiar with them now.
Dang, I gotta make more coffee. I'll do that while you go on to the next section.
|
|
|
|
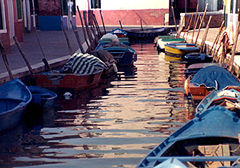
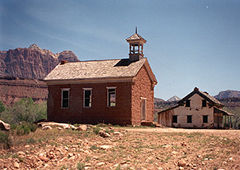
Image title would go here.
These are a few of my favorite photographs from my different travels. Feel free to browse them as you like. If you want one click your right mouse button and choose "Save As" from the menu. |
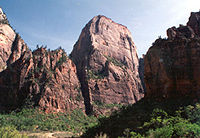
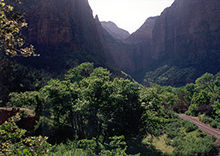
Image title would go here.
These are a few of my favorite photographs from my different travels. Feel free to browse them as you like. If you want one click your right mouse button and choose "Save As" from the menu. |
|
|
|
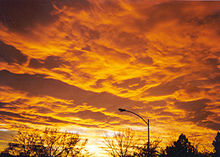
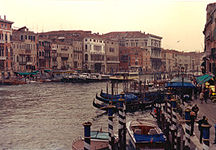
Image title would go here.
These are a few of my favorite photographs from my different travels. Feel free to browse them as you like. If you want one click your right mouse button and choose "Save As" from the menu. |
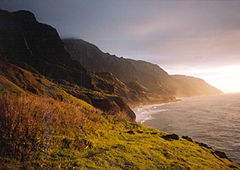
Image title would go here.
These are a few of my favorite photographs from my different travels. Feel free to browse them as you like. If you want one click your right mouse button and choose "Save As" from the menu. |
|
|
|
Image title would go here.
These are a few of my favorite photographs from my different travels. Feel free to browse them as you like. If you want one click your right mouse button and choose "Save As" from the menu. |
Image title would go here.
These are a few of my favorite photographs from my different travels. Feel free to browse them as you like. If you want one click your right mouse button and choose "Save As" from the menu. |
|
|
|
Image title would go here.
These are a few of my favorite photographs from my different travels. Feel free to browse them as you like. If you want one click your right mouse button and choose "Save As" from the menu. |
Image title would go here.
These are a few of my favorite photographs from my different travels. Feel free to browse them as you like. If you want one click your right mouse button and choose "Save As" from the menu. |
|
|
|